
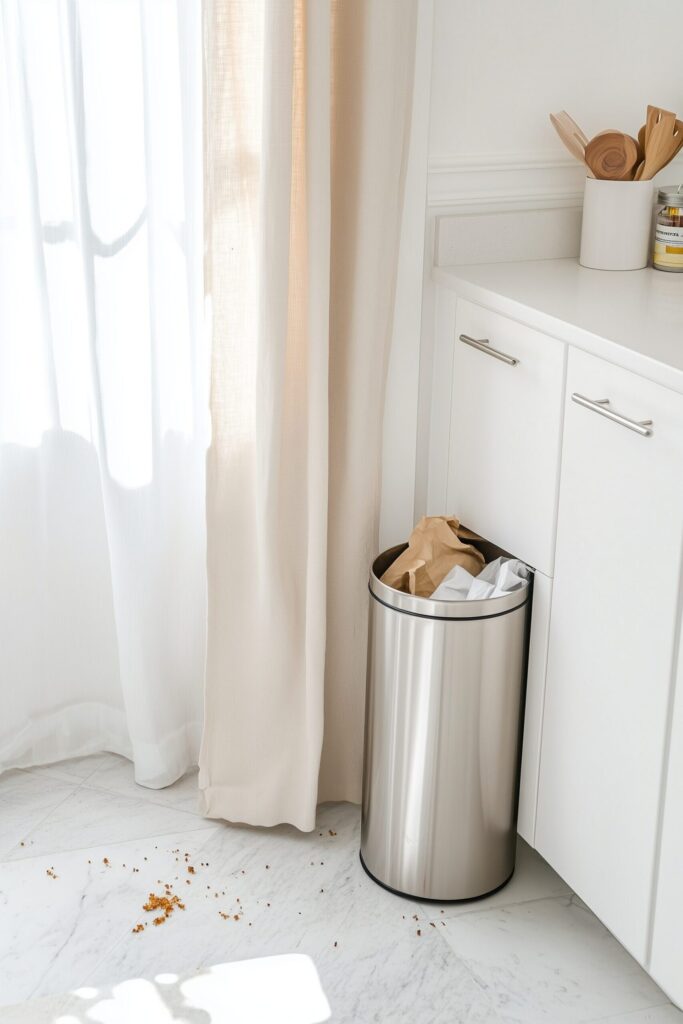
Let’s face it – cleaning your kitchen trash can is one of the least glamorous chores to do. If you’re like me, you do your best to keep the trash can cleaned until that horrible smell greets you the minute you walk into your kitchen. Once it wafts past your nose, you start wondering, “What died?!”. However, when you finally get the courage to clean the trash can, you find a slimy, unknown layer of grime that has had time to develop.
A dirty trash can isn’t just an unpleasant thing to smell – it can also contain bacteria, mold, and pests that can get into other parts of your kitchen. If you’ve ever felt disgusted taking out your trash, or felt like your kitchen has an odd smell even after you took out your trash, this post is your sign to finally deep clean your kitchen trash can. The best part is how easy it is to learn how to clean and disinfect your kitchen trash can properly. Plus, you’ll have that lovely odorless kitchen you have always wanted. So, go ahead and grab your gloves, and let’s turn your trash can into something that you won’t mind opening.
Now, here is the easy answer before we get into the weeds: the way to properly clean and disinfect your kitchen trash can is to empty it and rinse it out with warm soapy water, scrub it with a disinfecting cleaner, rinse it out again and then let it dry completely, preferably in the sunshine, if at all possible. Once dried, add a layer of deodorizer (like baking soda) or an odor-control liner. It all comes down to breaking down the dirt, cleaning bacteria and preventing odors from coming back.
Below, I will share with you exactly how to deep clean your kitchen trash can – inside, out, lid, and all – and how to keep it smelling fresh every day. If your inquiries include, “how to disinfect a kitchen trash can”, “best way to clean a stinky trash can” or “DIY trash can deodorizing”, this step-by-step will have you completely covered.
Why Does Your Kitchen Trash Can Get So Gross So Fast?
While it may seem like paranoia, it’s true: kitchen trash cans are bacteria magnets. Condiments, food scraps, and sticky metal and plastic make their way past the liner. Eventually, all these things create a perfect storm of decay and moisture, resulting in grime and odor. No matter how responsibly you live, small pinholes or leaks in bags allow all sorts of waste to seep into the can, and with a bag in there, or when jars are in there, it can easily sit at room temperature for days. (If it’s also next to something warm, like the oven, it sits at a temperature that encourages growth.)
If you’ve ever opened your lid and been struck with that rotten, sour garbage smell, what you have encountered is usually an anaerobic bacteria mixed with organic waste. The good news is that when you see what the funk is feeding on, you can process it so that it goes away!
Shop: kitchen trash can cleaner
What’s the Best Way to Prepare Before Cleaning?
Before you dive in, gather everything you’ll need so you can get it done efficiently—no stopping mid-clean to find a sponge. You’ll need:
- Rubber gloves
- Dish soap
- A scrubbing brush or sponge
- Disinfecting spray
- Baking soda
- Paper towels or microfiber cloths
- Access to a hose or a large sink (bathtub works too)
Remove the trash bag and any trash that is visible. If you are able to, take the can outside. It can get messy, and rinsing it out outside with a hose makes it quicker and easier. If you are inside, line your sink or tub with a towel that you do not mind scratching.
Shop: kitchen cleaning supplies
How Do You Deep Clean a Kitchen Trash Can?
Here’s the step-by-step method that actually works (and keeps smells away). I do this about once a month, or immediately if something spills inside.
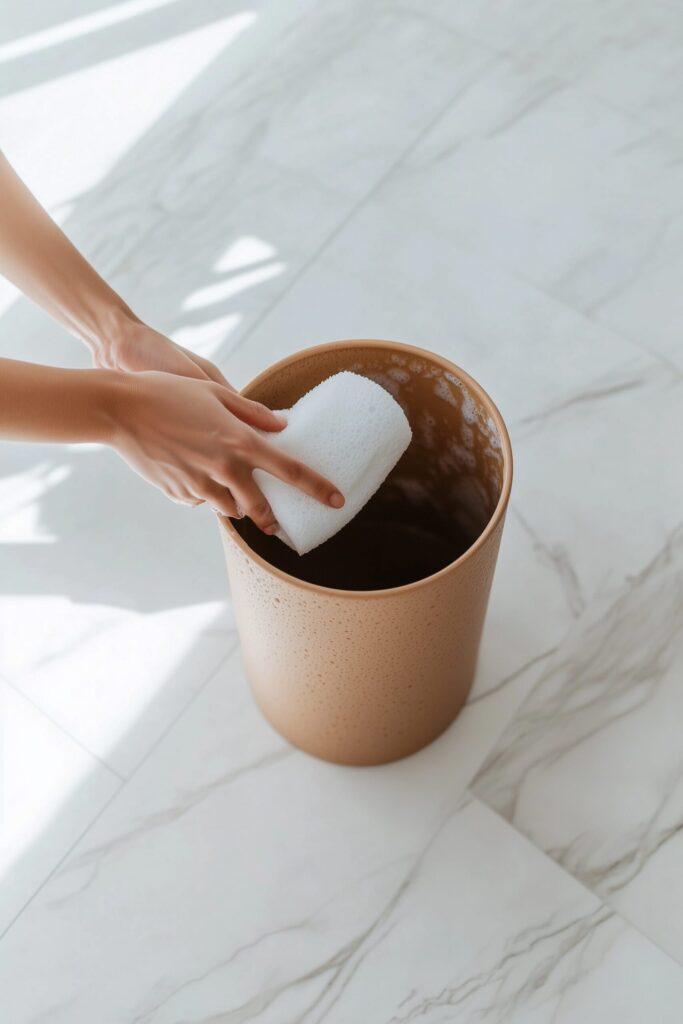
- Rinse out debris: Spray the entire can with a strong stream of water to flush out crumbs and sticky residue.
- Wash with soap: Add a few drops of dish soap and fill the can 1/4 with warm water. Swish it around or scrub every surface with your dish brush.
- Scrub the lid and foot pedal: These areas collect bacteria from your hands and shoes. Don’t skip them!
- Disinfect thoroughly: Spray the inside and outside with your chosen disinfectant spray. Let it sit for 5–10 minutes to kill germs before rinsing again.
- Rinse well: Any leftover cleaning-product residue can attract dirt or ruin the liner, so rinse until the water runs clear.
- Dry completely: Prop the lid open and let your can air dry in sunlight, which naturally helps disinfect and deodorize.
Shop: dish brush
How Can You Naturally Deodorize Your Trash Can?

Even if you are cleaning routinely, odors will return—especially odors from food, such as organic waste. The key is to use natural deodorizing agents that will absorb the odors before they develop. I have found a sprinkle of baking soda on the bottom of the can to be my favorite. The neutralizing effect of baking soda works great on acidic odors, and it also helps keep things dry. The best part? Every couple of bag changes you will have to simply add another sprinkle of baking soda.
You could also try putting a few drops of essential oil on a cotton ball (lemon, eucalyptus, or tea tree) and sticking it to the bottom of the liner where the can is. You will get a fresh, clean scent for a while (not as intense as an air freshener) but it lasts longer.
And one more tip I love is to try store-bought odor-control trash liners. The liners come pre-treated with a natural charcoal filtration. This is especially nice in the summer months because odors can multiply very quickly.
Shop: odor control trash bags
What Disinfecting Solutions Work Best?
If you want to achieve a sparkling clean finish but dislike the idea of using harsh chemicals, there are definitely options for you. A simple and brilliant mix of equal parts white vinegar and hot water is a very effective means of killing germs and neutralizing odors in the liner. Simply spray it generously, allow it to sit, and then scrub and rinse.
For tougher buildup or mold, you can safely use a small amount of bleach (about 1/4 cup per gallon of water) for maximum disinfection. Just a reminder, of course–rinse it thoroughly afterward and allow it to dry completely before putting the liner back in the aquarium.
Prefer something ready-to-go? Use a quality disinfecting wipe for daily touch-ups on the lid and handles.
Shop: household disinfectant
How Often Should You Clean Your Kitchen Trash Can?

Aim for weekly wipe downs and deep cleans once a month. The minute you see a visible smudge or drip on the outside, wipe it off, especially around the lid or the foot pedal. If your climate is more temperate or if you are frequently disposing of food waste, you may considering washing every two weeks. Obviously, preventative cleaning will keep the smell and bacteria down.
Lesson learned: If you keep up with maintenance inbetween, you won’t have to dread deep cleaning because it won’t feel like punishment at all. Even rinsing everything out every once in a while for ten minutes will make everything feel fresh longer.
Shop: trash can cleaning kit
How Can You Keep Your Trash Can Clean Longer?
If you’ve got yourself a clean can, you will want to make sure it stays that way! That means you’ll want to enact some simple but clever habits. Always use a liner, and when you carry it out, tie it up tightly. If you are going to throw away anything wet or sticky (like food scraps or coffee grounds), wrap it in a paper towel first.
After each bag change, do a fast check for crumbs or leaks at the bottom. Spray the inside with a quick mist of multi-surface cleaner and wipe before putting in a new bag.
For added freshness, keep some activated charcoal deodorizers nearby—they’re reusable and absorb odors naturally. Your kitchen will smell clean longer, and your trash can will thank you.
Shop: trash can deodorizer
Can You Use This Same Method for Outdoor Bins?
Absolutely. Outdoor trash cans usually need stronger cleaning because they attract bugs, maggots, and mildew. The same basic steps apply, but add a stronger scrubbing phase with a long-handled deck brush, use a hose for full rinsing, and consider spraying insect repellent around the rim afterward to deter pests.
For outdoor bins, dry time matters even more—make sure they’re completely dry before closing the lid or you’ll trap moisture, which leads right back to odor and bacteria growth.
Shop: outdoor trash bin cleaner
Final Thoughts—A Fresh Trash Can, A Fresher Kitchen
Even though your trash can might not be the first thing people notice in your kitchen, it has a huge influence on the overall feel of your space. When your bin is clean, there are no weird smells, fewer germs, and a place where you like to cook and eat. More importantly, it’s a small win that can give you that gratifying feeling of organization and control over your kitchen.
You will never let it get disgusting once you have done it one time—the difference is remarkable. Treat your trash can like any other part of your kitchen that needs care, and you will be surprised at how fresh everything smells.
This post was all about How to Clean and Disinfect a Kitchen Trash Can the Right Way
FAQ
- How do I disinfect a trash can without bleach? Try white vinegar mixed with hot water—it kills bacteria naturally without harsh chemicals.
- Can I put my trash can in the dishwasher? Only if it’s small, plastic, and labeled dishwasher-safe. Large cans should be washed by hand.
- How do I stop my trash can from smelling between washes? Sprinkle baking soda at the bottom or use a charcoal-based deodorizer packet.
- Should I clean my trash can if I always use liners? Yes! Even the best liners can leak or tear, allowing grime to build up.
- What’s the fastest way to clean a trash can? Rinse, spray with disinfectant, scrub, and let it air dry—takes less than 15 minutes.


Leave a Reply