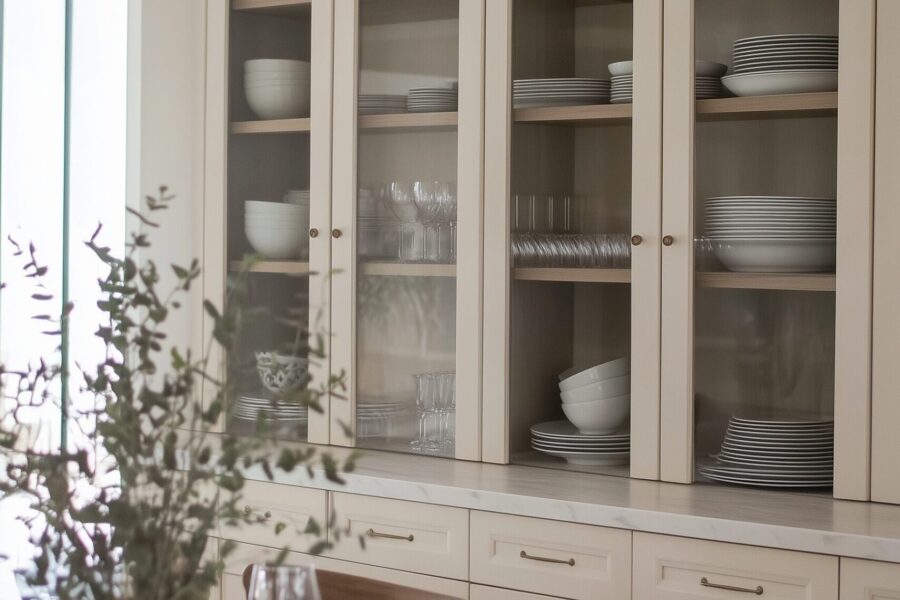
It’s no wonder why farmhouse kitchens dominate Pinterest and Sunday scrolling—the aesthetic feels warm, functional, and, most importantly, completely lived in. With open shelving especially, the shelves become little narratives of our everyday lives: the coffee mugs you reach for each morning, the beautiful mixing bowl you actually use, and the pitcher you obtained from your mom after she thrifted it. When styled well, the open shelving ties the whole look of the room together to create an intentional and cozy feeling; however, it can quickly shift from curated to cluttered in no time if not stacked and styled as recommended.
What’s that simple equation? One cohesive color story (3-4 tones!), and a mix of matte and warm textures (wood, ceramic, iron, linen) as a start. Build some height with a couple of tall anchors on your open shelving, dressed with dishes, lidded jars, and then add some greenery. Group in odd numbers, vary heights, repeat materials, leave breathing room, and voila! Just that will make your open shelving in a farmhouse kitchen look both curated and practical.
If you’ve been searching “farmhouse kitchen open shelving ideas” or “modern farmhouse shelf styling” or, “neutral rustic kitchen shelf decor,” then you’re in the right place. Below, I’ve shared my step-by-step formula to layout a design in your own home or for a client—the same layout all the Pinterest photos reference to recreate, that photographs beautifully—and most importantly—will hold up to real life, while bringing a bit of extra cheer to your morning coffee routine to boot!
Shop rustic kitchen shelf decor
The 10-Minute Quick-Start Formula (bookmark this)
- Pull everything off. Wipe shelves, then add just the best 60%.
- Choose a palette: creams + warm wood + black or brass accents + a soft green.
- Place two anchors: a tall crock or cutting board stack on the left; a pitcher or woven basket on the right.
- Add daily-use dishes front and center. Stacks of 3–6 look clean and intentional.
- Decant pantry basics (flour, sugar, oats) into clear jars with simple labels.
- Layer art or a framed recipe behind smaller items for depth.
- Finish with life: a trailing pothos, olive branches, or a small herb pot.
- Step back. Remove one thing per shelf. Done.
Pick Your Palette & Materials (so it never looks messy)
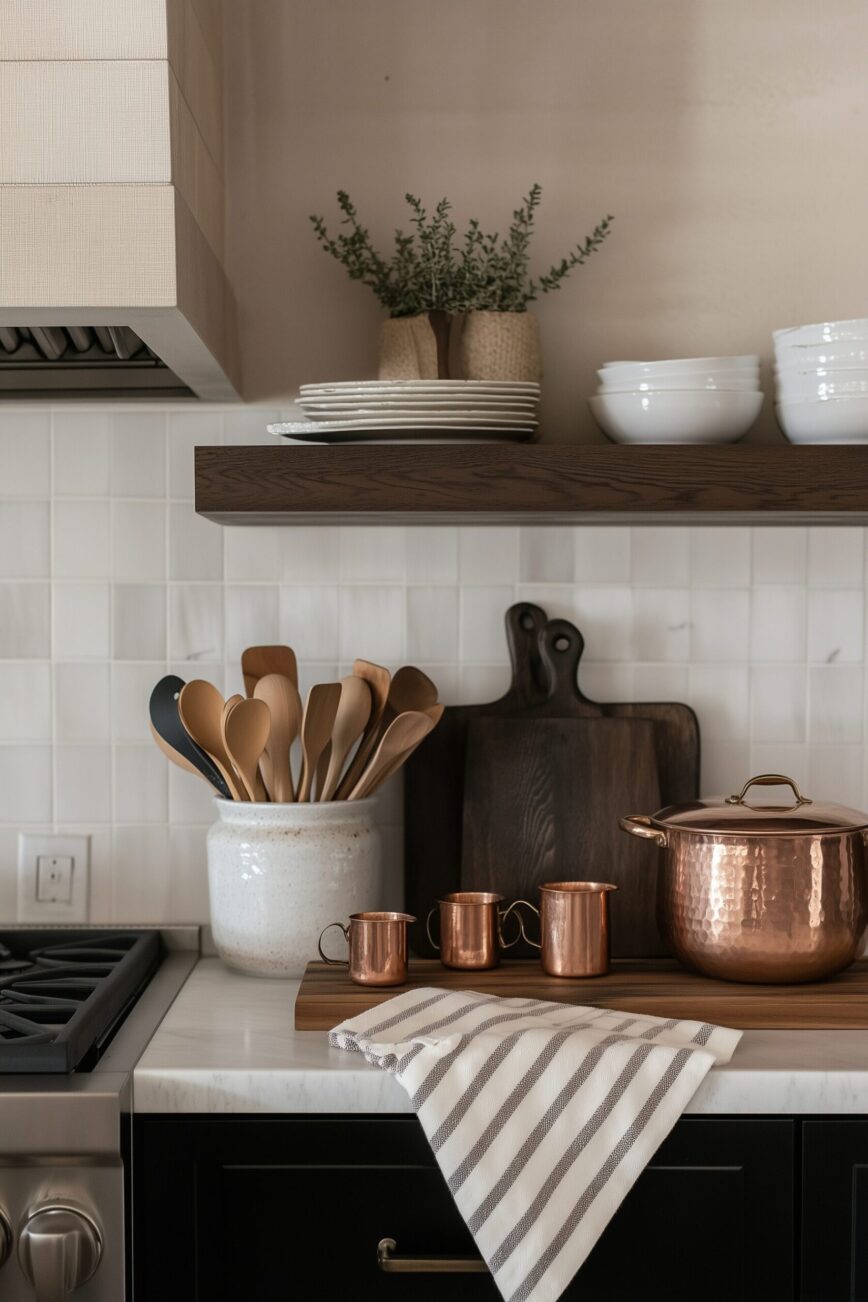
Farmhouse shelves will have the most appeal when colors repeat. For example, try creamy whites, warm oak or walnut, black/iron, and soft sage. Be sure to repeat whatever color or material at least twice for each shelf grouping: white plates + white ramekins; wood boards + wood riser; black salt cellar + black measuring spoons. When you limit tones, even combined items will look like they belong together instead of a yard sale.
Material mix to aim for:
- Wood: bread boards, risers, trays.
- Ceramic/stoneware: bowls, mugs, utensil crocks.
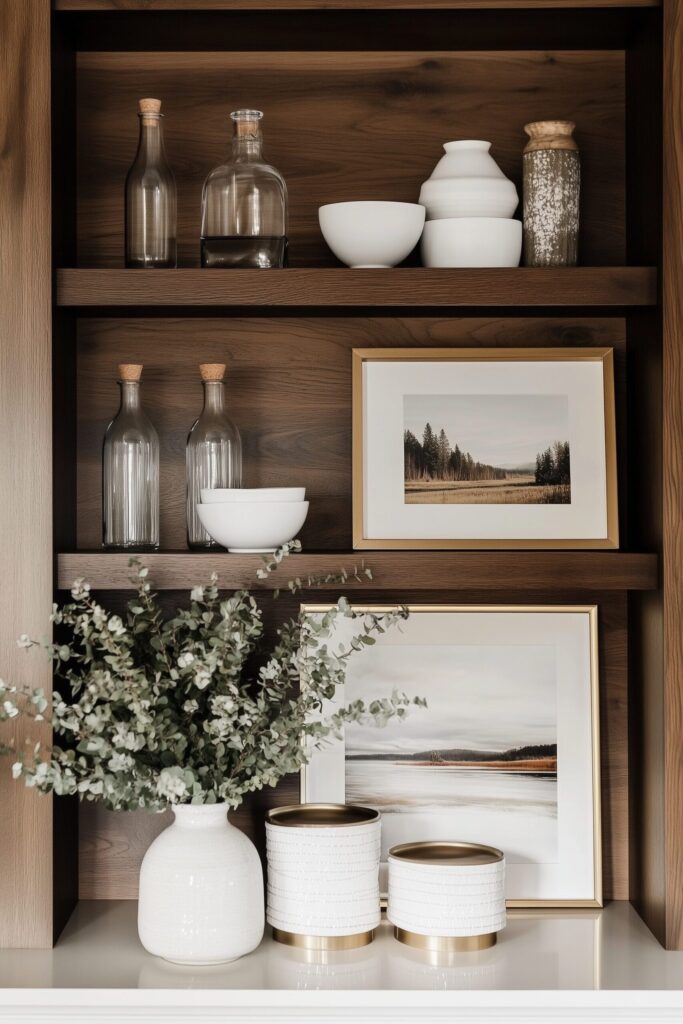
- Glass: jars, cloches, drinking glasses.
- Metal: iron brackets, brass pepper mill, copper measuring cups.
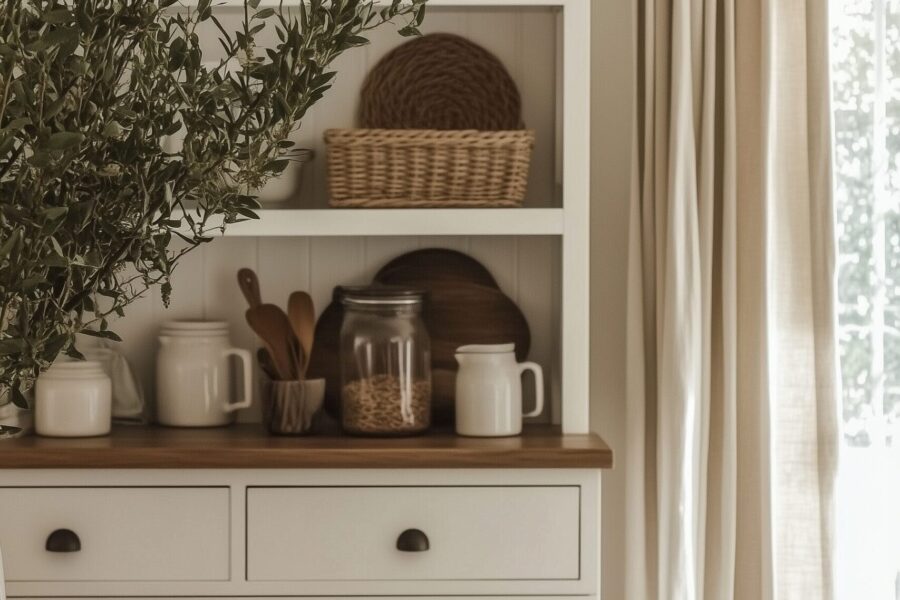
- Natural fiber: wicker baskets, linen tea towels.
Shop wooden cutting boards set
Place Anchors: Tall, Sculptural, Useful
Commence each shelf display with an “anchor” piece—something taller or more visually solid that helps to ground the vignette. A 12–15″ bread board leaning against the wall is an excellent anchor, as well as a vintage pitcher or a lidded stoneware jar. Lean and angle boards slightly, and overlap different sizes, letting a handle sneak by. Then, on the opposite end, range your height with either a crock of wooden spoons or handled basket. (Even a wooden tray or box for short/long items.) Something that creates a visual balance and frames the middle shallows.
Professional trick: place your heaviest visual anchors on the bottom shelf and lighter on the top. This prevents the whole wall from feeling too top-heavy.
Make Everyday Dishes the “Star Props”
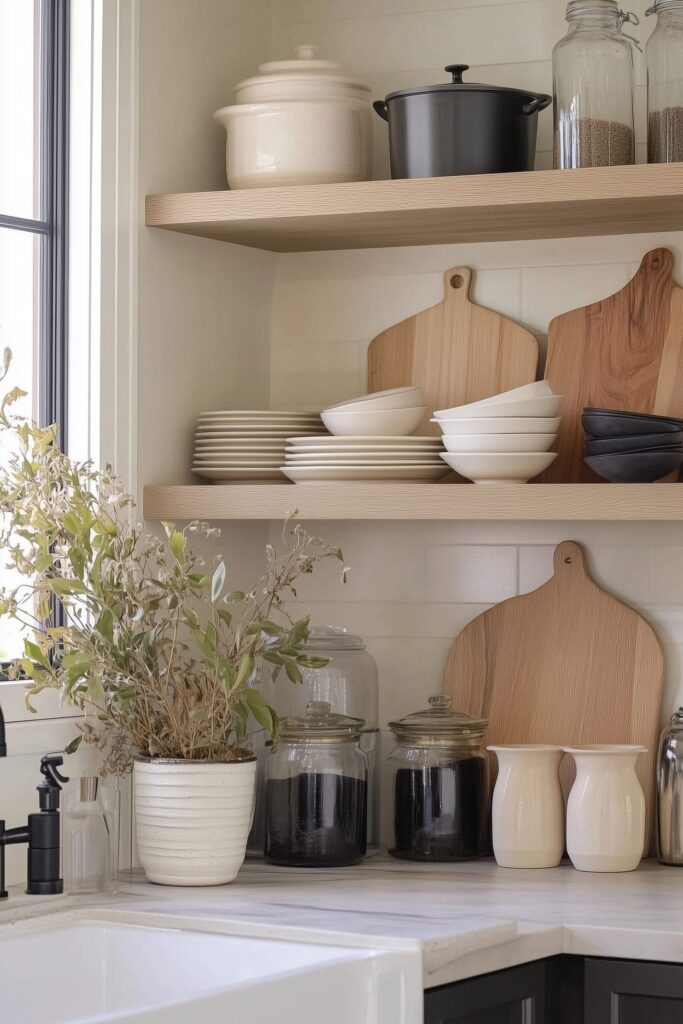
Farmhouse isn’t fussy; it’s functional. Give daily-use pieces front row seats: dinner plates stacked, cereal bowls nested, mugs hung or lined up. Stacks should be short enough to grab with one hand. If you entertain, keep 6–8 plates on display and stash extras in a base cabinet.
Tip: add a low wood riser so a small stack doesn’t feel lost. Height variation keeps the eye moving and photographs well.
Play With Height, Shape, and the Rule of Odds
One of the reasons designers choose odd-number groupings is that they feel natural. Create little images of “clusters” of 3 or 5 items: one tall (board, vase), medium height (bowl, jar), and small height (salt cellar, bud vase). Replace some of your heights for triangles and run that triangle rhythm left-to-right.
If a shelf feels flat, throw in a cylindrical form (rolling pin, canister), something horizontal (folded linen), and something that has a handle or spout. That creates action!
Shop vintage-style salt cellars
Books, Art, and Greenery (the cozy trifecta)

A small framed recipe, a landscape print, or a botanical sketch propped at the back adds instant depth. Tuck one or two skinny cookbooks horizontally beneath a bowl or object to raise it an inch or two. Add life: eucalyptus in a glass jug, a fresh basil plant, or a trailing pothos plant. Greenery softens all the hard edges of bowls and jars.
Not enough natural light? Fake stems are just as good. Just be sure to look for wired branches that you can bend to create a more realistic draped look.
Decant & Label (pretty storage that actually works)
Open shelves pull double duty as storage. To keep it clean-looking, decant dry goods into airtight glass with matching lids. Use simple, all-caps labels or a grease pencil you can rewrite. Keep all labels in the same spot (front-center or bottom-right) so your eye reads a clean line.
What to decant: baking staples, oats, coffee beans, loose tea, pasta, snacks. Keep multiples in the same style jar for cohesion.
Layer Linens & Baskets for Warmth
Textiles are the easiest way to add “farmhouse cozy.” Fold a striped tea towel under a stack of plates, hang one from a hook, or drape it over a riser. Add one woven basket per shelf run to corral small things—tea packets, napkin rings, chip clips—so bits don’t visually clutter.
Stick to heavyweight cotton, linen, or grain-sack stripes. Keep patterns subtle so they support, not steal, the show.
Mix Metals (lightly) to Avoid Matchy-Matchy

A touch of metal brings shine and contrast. If your faucet and hardware are black, add a small brass pepper mill or copper measuring cups to warm it up. Keep to two metals total across the wall. Repeat each metal two or three times so it looks intentional, not random.
Seasonless Base, Easy Seasonal Swaps
Build a base you love year-round: white dishes, wood boards, clear jars, greenery. Then rotate tiny accents by season: a bundle of wheat in fall, a tiny pine in winter, a bowl of lemons in spring, a striped linen in summer. The shelf footprint stays the same, but the vibe shifts with almost no effort.
Small Kitchen? Here’s How to Keep It Airy
- Limit open shelves to one wall or one stack of 2–3 shelves.
- Go 70% functional (dishes, jars), 30% decorative (art, stems).
- Use mostly light tones: white dishes, clear glass, pale woods.
- Keep bottom shelves heavier; top shelves extra minimal.
- Leave at least 20–30% empty space on each shelf.
Common Mistakes to Avoid (and quick fixes)
- Too many colors. Fix: choose 3–4 and put everything else in a cabinet.
- All items the same height. Fix: add one tall, one medium, one small per cluster.
- Busy labels and mismatched jars. Fix: uniform jars + simple labels.
- Only decor, no function. Fix: bring your daily dishes up—let them do the heavy lifting.
- Overcrowding. Fix: remove one item per shelf and add negative space.
A 30-Minute Styling Sprint (follow this order)
Minute 0–5: Clear shelves, wipe, and quickly sort keep/donate/store.
Minute 5–10: Place left/right anchors on each shelf: boards left, pitcher right.
Minute 10–15: Add everyday dishes in stacks; put mugs near the coffee zone.
Minute 15–20: Decant 3–5 staples into jars; line labels consistently.
Minute 20–25: Tuck in art/cookbooks for depth; add one linen.
Minute 25–30: Finish with greenery and a small metal accent. Step back, take a photo, remove one thing.
Cleaning & Maintenance (so it stays pretty)
- Dust weekly with a dry microfiber cloth; do a deeper wipe monthly with a barely damp cloth.
- Store greasy items (oils, vinegars) on a tray you can wash, not directly on wood.
- Rinse faux stems in cool water occasionally to remove dust.
- Keep a not-too-precious mindset: open shelves are meant to be used. Minor wear = charm.
Shop microfiber cleaning cloths
Budget-Friendly Add-Ins That Look High-End
- Thrifted ironstone bowls and mismatched white mugs: mix brands, match color.
- Bulk glass spice jars with uniform labels for a pro look.
- One splurge pepper mill or Dutch oven as the “hero” piece next to budget basics.
- DIY risers: flip a wood bowl or stack two cutting boards.
- Printable vintage art in slim frames for depth without bulk.
Sample Shelf Maps You Can Copy
Two 36″ shelves, left to right:
TOP SHELF
• Left cluster: Tall bread board + 8″ board layered; small framed sketch in front.
• Center: 2 stacks of cereal bowls on a riser; linen peeking out.
• Right cluster: Medium glass canister (tea), small salt cellar, trailing stem.
BOTTOM SHELF
• Left: Utensil crock + copper measuring cups hung on a small hook rail.
• Center: Stack of dinner plates; low basket with teas behind a small art print.
• Right: Pitcher with olive stems; two canisters (coffee, sugar) side by side.
Troubleshooting: “It still looks off. Help!”
- If it’s bland: introduce one contrast piece in black or brass and a sprig of green.
- If it’s chaotic: remove colored packaging; decant or hide it; unify jars.
- If it’s heavy on one side: move one tall piece to the opposite side and add a low item where it was.
- If it’s flat in photos: slide a small frame or a vertical cookbook behind an object to add depth.
Quick Shopping Checklist
- 2–3 wood boards (vary heights)
- 1 utensil crock + wooden spoons
- 2–4 glass canisters (same style) + labels
- Everyday white dishes (plates, bowls, mugs)
- 1–2 woven baskets with lids
- 1–2 framed prints (small)
- Greenery (olive or eucalyptus stems, or a herb pot)
- 1 riser or cake stand
- 1 metal accent (pepper mill or measuring cups)
- 2–3 neutral tea towels
Reader Q&A
Q: How do I keep my open shelves from getting greasy near the stove?
A: Keep oils and vinegars in a washable tray, install a good vent hood, and rotate-wash front items monthly. Place most-used cooking items one shelf away from the cooktop.
Q: Can I do open shelves in a rental without drilling?
A: Use existing shelves to style smarter. Add risers, trays, and leaning art for depth and the same vibe—no holes needed.
Q: Are dark wood shelves okay in a small kitchen?
A: Yes. Balance with light dishware and clear glass, and keep the top shelf sparer so it still reads airy.
Q: What’s the best way to style mugs?
A: Either line up 4–6 in a row or hang a few on a small hook rail under the shelf. Keep them one color so it doesn’t get busy.
Q: How often should I declutter?
A: Seasonally. Do a quick 15-minute sweep: remove duplicates, decant new staples, and rotate a fresh linen or stem.


Leave a Reply